
Credit: Shutterstock
A cheerful Christmas countdown craft filled with tiny surprises, sweet treats, and fun activities that make every December morning feel special.
The countdown to Christmas can be just as exciting as the big day itself, especially when children get to open a little surprise every morning. While store-bought advent calendars are convenient, making your own version adds a personal touch that kids will remember long after the holidays are over.
Enter the matchbox advent calendar — a charming, budget-friendly craft that transforms ordinary small boxes into a festive countdown full of surprises. Each box holds a tiny gift, a sweet treat, a joke, or a fun activity, giving children something to look forward to every day.
The best part? You don’t need expensive craft supplies or professional DIY skills to make one. With a little creativity, some colorful paper, and a collection of small boxes, you can create a Christmas decoration that’s both adorable and meaningful.
What Is a Matchbox Advent Calendar?
A matchbox advent calendar uses small boxes arranged and decorated to represent the days leading up to Christmas, usually December 1 through December 24. Each box is numbered and filled with a surprise that children can discover when they open it.
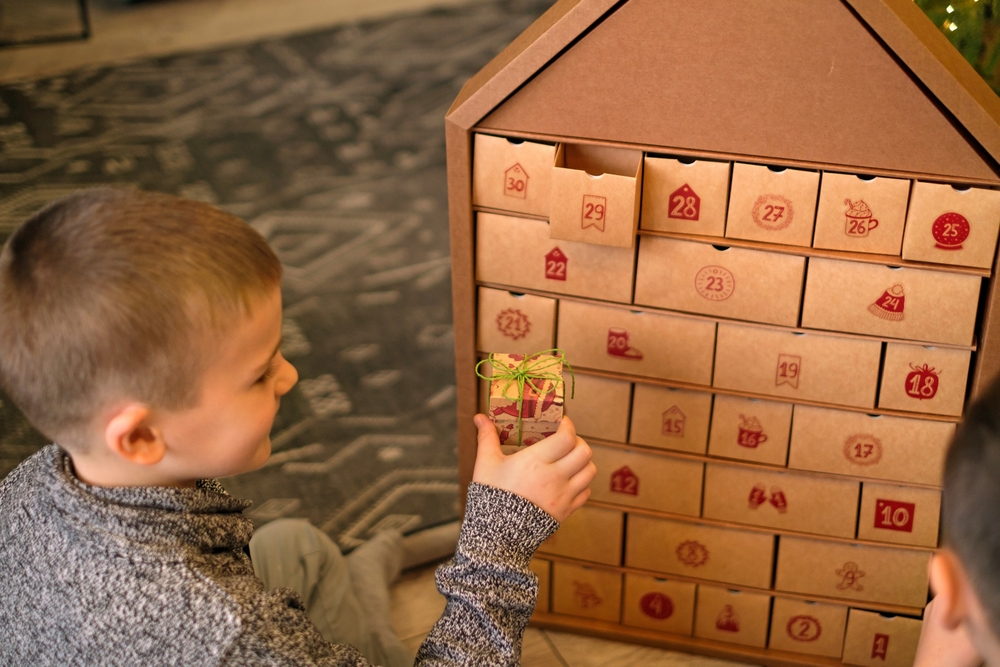
Unlike traditional paper calendars with tiny windows, matchbox versions have little drawers that slide open, making the experience feel like unwrapping a miniature present every day.
You can arrange the boxes into a Christmas tree, a colorful house, a little village, or a simple grid. The design is entirely up to you, so it’s easy to match your family’s holiday decorations or your child’s favorite colors.
Supplies You’ll Need
Before getting started, gather everything you need. Most of these supplies are inexpensive and may already be in your craft drawer.
-
24 small, empty matchboxes or similarly sized paper boxes
-
Colored cardstock, wrapping paper, or scrapbook paper
-
Child-safe glue or double-sided tape
-
Scissors
-
Markers, pens, or number stickers
-
Ribbon, twine, or small decorative bows
-
Stickers, glitter-free embellishments, or festive cutouts
-
Small gifts, notes, treats, or activity cards
-
A piece of sturdy cardboard for the backing, if needed
A quick safety tip: Use empty, unused matchboxes only after removing all matches and striker strips. Never leave matches within children’s reach. For younger kids, small paper gift boxes are a safer alternative, especially if the calendar will contain tiny objects.
How to Make a Matchbox Advent Calendar Step by Step
Step 1: Gather and Prepare Your Boxes
Start with 24 empty matchboxes. If you don’t have enough, you can collect them over time or purchase small craft boxes in bulk.
Slide each drawer out carefully and check that it moves smoothly. Remove any loose paper or rough edges that could make opening the boxes difficult.
If the boxes are flimsy, reinforce them with a little cardstock. You want the drawers to be sturdy enough to hold small surprises without falling apart.
Step 2: Decorate Each Little Drawer
This is where the fun begins! Cut small pieces of wrapping paper or cardstock to fit the outside of each box. Choose a color scheme to make the finished calendar look coordinated.
Classic red, green, gold, and white create a traditional Christmas look. Pastel pink, mint green, and cream offer a softer style, while bright rainbow colors can make the calendar feel especially playful.
Use stickers, tiny stars, paper snowflakes, or simple patterns to decorate the drawers. If your children enjoy crafting, let them choose some of the colors and embellishments.
Remember, perfection isn’t the goal. Slightly mismatched boxes can make the calendar feel more personal and handmade.
Step 3: Add Numbers From 1 to 24
Write or attach numbers to the front of each drawer, starting with 1 and ending with 24.
You can use number stickers, handwritten labels, or small paper circles. Try mixing different fonts and colors to make the boxes visually interesting.
For younger children who are still learning their numbers, choose large, clear numerals. You could also add a simple picture beside each number, such as a star, a tree, or a candy cane.
Step 4: Choose Your Calendar Shape
Once the drawers are decorated, decide how you want to display them.
Here are three easy designs:
-
Christmas tree: Arrange the boxes in a triangle, with one box at the top and wider rows underneath. Add a paper star and a small trunk.
-
Colorful grid: Place the boxes in four rows of six or six rows of four. This layout is simple, compact, and easy to organize.
-
Mini Christmas village: Decorate the boxes to resemble tiny houses, adding paper roofs, windows, and doors.
If you want the calendar to stand upright, glue the outer boxes onto a sturdy cardboard backing or place them inside a shallow tray. If you want children to open the drawers independently, avoid gluing the sliding parts shut.
For a reusable calendar, attach the boxes to a backing with removable adhesive or keep them together in a shallow decorative container.
Step 5: Fill the Boxes With Kid-Friendly Surprises
This is the step that makes the calendar truly special. Rather than filling every box with candy, mix small gifts with activities and thoughtful messages.
The surprises don’t need to be expensive. Children often enjoy the excitement of discovering something unexpected more than the price or size of the gift.
Here are some ideas to get you started:
-
Mini stickers or temporary tattoos
-
Cute erasers or small stationery items
-
A Christmas joke written on a tiny card
-
A festive coloring page folded into a small square
-
A coupon for choosing the bedtime story
-
A note inviting the family to make hot chocolate
-
A clue for a mini treasure hunt
-
A Christmas-themed puzzle or riddle
-
A small wrapped chocolate, if appropriate for the child
-
A note suggesting a family movie night
-
A homemade paper ornament
-
A compliment or a message about something you love about your child
Check the dimensions of each surprise before filling the boxes. If something doesn’t fit, use a folded note directing the child to a larger surprise hidden elsewhere.
Step 6: Make Every Day Feel Different
The secret to an advent calendar children actually love is variety. If every drawer contains the same type of treat, the excitement can fade.
Try alternating between small gifts, edible treats, and activities. For example, a Monday box might contain a sticker, Tuesday could feature a silly joke, and Wednesday could invite everyone to bake cookies together.
You can also make weekends extra special with slightly bigger activities, such as decorating the Christmas tree, visiting a holiday market, or having a family game night.
Keep the activities realistic for your schedule. A simple five-minute activity can be just as memorable as an elaborate outing.
Step 7: Add the Finishing Touches
After filling all 24 drawers, give the calendar a final check. Make sure the numbers are easy to read, the drawers slide smoothly, and the decorations are securely attached.
Add a ribbon, a paper star, or a festive sign reading “Christmas Countdown.” You could even personalize the calendar with your child’s name.
Place it somewhere visible but secure, away from candles, heaters, and other potential hazards. If you have toddlers or younger siblings at home, keep small pieces and treats out of reach unless an adult is supervising.
24 Matchbox Advent Calendar Surprise Ideas
Need help deciding what to put inside each drawer? This sample plan combines inexpensive gifts, family activities, and little moments of kindness.
| Day | Surprise idea |
|---|---|
| 1 | A festive sticker |
| 2 | A Christmas joke |
| 3 | A coloring activity |
| 4 | A mini eraser |
| 5 | A family dance party |
| 6 | A small chocolate |
| 7 | A Christmas story |
| 8 | A treasure hunt clue |
| 9 | A holiday drawing challenge |
| 10 | A cute stationery item |
| 11 | A kindness challenge |
| 12 | A homemade paper ornament |
| 13 | A favorite family game |
| 14 | A festive snack |
| 15 | A silly riddle |
| 16 | A coupon for choosing a story |
| 17 | A Christmas-themed coloring page |
| 18 | A small toy suitable for the child’s age |
| 19 | A family movie-night invitation |
| 20 | A holiday sing-along |
| 21 | A handwritten compliment |
| 22 | A cookie-decorating activity |
| 23 | A special Christmas Eve note |
| 24 | A letter or small gift from the family |
Feel free to rearrange the ideas based on your child’s age, interests, allergies, and your family’s holiday traditions. If you celebrate Christmas without emphasizing gifts, the calendar can be filled entirely with activities, stories, kind messages, and family time.
Tips to Make Your Calendar More Exciting
Personalize It Around Your Child’s Interests
Does your child love dinosaurs, animals, drawing, or building things? Give the calendar a theme that reflects those interests. A dinosaur-loving child might enjoy tiny dinosaur stickers, while a budding artist might prefer colorful pencils and drawing prompts.
Personalization makes even a simple handmade calendar feel thoughtfully created just for them.
Keep the Gifts Small and Affordable
There’s no need to spend a fortune on 24 surprises. Set a budget before shopping and focus on little things that are useful, fun, or meaningful.
You can reuse craft supplies you already own, print activities at home, and write your own notes. A few inexpensive toys mixed with homemade surprises can create a wonderful experience.
Include Activities That Bring Everyone Together
The most memorable surprises aren’t always physical objects. A note inviting your child to play a game, help decorate cookies, or read a favorite story can turn an ordinary evening into a special memory.
Choose activities that fit your family’s routine so the calendar remains enjoyable rather than becoming another holiday obligation.
Make It Reusable for Next Year
If you’d like to use the calendar again, keep the decorations sturdy and avoid permanently sealing the drawers. After Christmas, empty the boxes, store them in a dry container, and save the activity cards and number labels for next year.
You can refresh the calendar each December with new surprises while keeping the same basic design.
Common Mistakes to Avoid
A few small adjustments can make the project easier and safer.
-
Overfilling the drawers: Tiny boxes have limited space, so check the size of each gift before placing it inside.
-
Using fragile decorations: Avoid embellishments that fall off easily, especially around younger children.
-
Making every surprise expensive: Simple notes and activities can be just as exciting as toys.
-
Leaving everything until the last minute: Prepare the boxes and collect the gifts ahead of December 1.
Ignoring age suitability: Avoid choking hazards, sharp objects, button batteries, magnets, and unsuitable sweets. Small toys should be appropriate for the child’s developmental stage, with adult supervision where needed.
A Little Craft That Creates Big Christmas Memories
A matchbox advent calendar is more than a festive decoration. It’s an opportunity to create small moments of excitement, encourage creativity, and build family traditions that children can look forward to each year.
With 24 little drawers, a few affordable supplies, and surprises chosen with care, you can make something that feels far more personal than a store-bought calendar. Keep it colorful, make the activities manageable, and let your child’s interests guide the design.
After all, the real magic isn’t what’s hidden inside each box. It’s the anticipation, laughter, and happy memories that come with opening one little surprise at a time.