Credit: Shutterstock
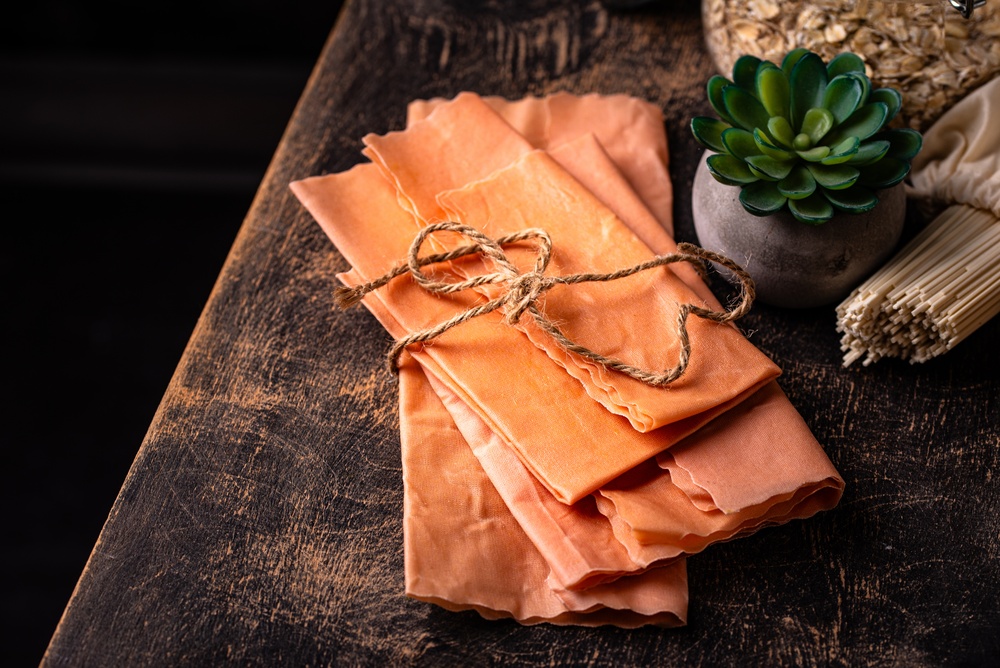
If your kitchen seems to go through rolls of plastic wrap at an impressive speed, it might be time to try something a little more reusable. Beeswax wraps are washable pieces of cotton fabric coated with a thin layer of beeswax mixture. They can be molded around bowls, wrapped around sandwiches, or folded over cut fruits and vegetables.
The best part? You can make your own at home with a few simple supplies and spend a relaxing afternoon turning leftover fabric into something genuinely useful.
What Are Beeswax Wraps?
Beeswax wraps are pieces of cotton fabric infused with melted beeswax. Once the coating cools, the fabric becomes slightly water-resistant and can be shaped with the warmth of your hands.
A basic beeswax-only wrap is easy to make, but adding a small amount of jojoba oil can make it more flexible, while pine or tree resin gives the wrap the tackiness needed to grip bowls and stick to itself.
They aren’t a replacement for every type of food storage, but they’re particularly handy for everyday items such as bread, cheese, sandwiches, herbs, cut vegetables and covering bowls of cool food.
What You’ll Need
For a small beginner-friendly batch, gather:
- 100 g pure beeswax, preferably pellets or finely grated
- 25–50 g food-grade pine resin or tree resin
- About 15–25 g food-grade jojoba oil
- 100% cotton fabric
- Baking parchment
- Baking tray
- Double boiler or heatproof bowl over a saucepan
- Old paintbrush or silicone brush
- Scissors or pinking shears
- Wooden spoon or spatula
- Oven or iron
There isn’t one universally agreed formula for beeswax wraps, so you can adjust the mixture depending on how soft or sticky you want the finished wraps. A commonly used starting point is around 4 parts beeswax, 2 parts resin and 1 part jojoba oil by weight.
If this is your first attempt, making a small test wrap before coating several pieces of fabric is a smart move.
Choose the Right Fabric
Start with clean, pre-washed 100% cotton fabric. Lightweight quilting cotton works particularly well because the wax can penetrate the fibers without making the finished wrap excessively heavy.
Avoid synthetic fabrics such as polyester. They aren’t designed for this type of food-contact project and won’t absorb the wax mixture in the same way.
You can use colorful cotton scraps, old cotton shirts or leftover sewing fabric, provided they’re clean and made from suitable natural cotton.
Cut the fabric into squares or rectangles depending on how you’ll use them. Around 20–25 cm square is a useful size for a first wrap.
Pinking shears can be used around the edges to reduce fraying, although the wax coating itself also helps stabilize the fabric.
Step 1: Prepare the Wax Mixture
Place the beeswax, finely crushed resin and jojoba oil into a heatproof bowl.
Set the bowl over a saucepan containing gently simmering water to create a makeshift double boiler.
Heat the mixture slowly, stirring occasionally until everything has melted together.
The resin can take longer to melt than beeswax, so don’t be surprised if the mixture takes a little patience. Keep the heat controlled rather than trying to speed things up with a high flame.
Work in a well-ventilated area, particularly when using resin.
Step 2: Prepare Your Cotton
Place a piece of parchment paper on a baking tray and lay your cotton fabric flat on top.
Try to keep the fabric completely smooth.
You’ll want the wax mixture to reach the entire surface, including the edges. An uneven coating can leave sections of cotton too dry or make one area considerably heavier than another.
Step 3: Coat the Fabric
Using an old paintbrush, spread a thin layer of the melted mixture across the cotton.
You don’t need to completely drown the fabric in wax. The goal is to saturate it evenly without leaving thick pools on top.
Make sure you reach the corners and edges.
Another easy approach is to place the fabric between two sheets of baking parchment and gently press the mixture through it with a warm iron. The Natural History Museum recommends the parchment-and-iron method as a simple way to melt beeswax evenly into cotton.
Step 4: Let the Heat Do the Work
If you’re using an oven, place the coated fabric on a parchment-lined tray and warm it briefly at a low temperature until the wax becomes completely melted and spreads through the cotton.
One established DIY method uses a short oven heating period to help the mixture absorb into the fabric.
Keep a close eye on it. You’re melting the wax, not baking the fabric.
If you notice dry areas, add a little more mixture and warm it again.
Step 5: Cool the Wrap
Once the fabric is evenly coated, carefully lift it from the tray using tongs or the edges.
Hold it up for a few moments or place it on a cooling rack.
The wax should begin hardening quickly as the fabric cools.
Once completely set, your homemade beeswax wrap is ready to use.
How to Use Beeswax Wraps
Using them is surprisingly simple.
Place the wrap over a bowl or around the food you want to cover. Warm the fabric gently between your hands and press it around the edges.
Your body heat softens the wax just enough to make the wrap moldable. As it cools, it firms up and holds its shape.
They’re especially useful for:
- Sandwiches
- Bread and rolls
- Cheese
- Cut vegetables
- Fresh herbs
- Fruit
- Snacks
- Covering bowls
- Half-used vegetables such as cucumber or bell pepper
For irregularly shaped food, simply press and fold the wrap around it with your hands.
How to Clean Beeswax Wraps
After using a wrap, wash it gently with cool or lukewarm water and a small amount of mild dish soap.
Don’t scrub aggressively. Rinse it well and allow it to air-dry completely before folding it away.
The important thing to remember is that beeswax softens with heat, so very hot water, dishwashers and high-temperature cleaning can damage the coating.
Store completely dry wraps somewhere cool and away from direct sunlight.
What Shouldn’t Go in a Beeswax Wrap?
This is where homemade food wraps need a few rules.
Don’t use them with hot food. Allow food to cool before wrapping it because heat can soften the wax and transfer it onto the food or container.
Don’t put them in the microwave. Beeswax melts at relatively low temperatures, so a microwave isn’t an appropriate place for a wax-coated wrap.
It’s also sensible to avoid using reusable beeswax wraps for raw meat, raw poultry and raw fish, particularly because the wraps cannot be washed with the high temperatures normally used to thoroughly clean surfaces exposed to raw animal products.
For those foods, a washable food-safe container is a better choice.
Beeswax Only vs Beeswax, Resin and Oil
Wondering whether you really need all three ingredients?
Not necessarily.
A beeswax-only wrap is the simplest version and can work well for basic covering. However, it tends to be stiffer and may not have enough tackiness to cling firmly to bowls or itself.
Jojoba oil helps make the coating more flexible, while pine or tree resin adds grip. The combination produces a wrap that’s generally easier to mold and seal.
If you’re just experimenting, start small rather than making a huge batch.
Troubleshooting Your Homemade Wraps
The wrap is too stiff
You may have applied too much beeswax.
Try using a little more jojoba oil in your next batch, or reheat the existing wrap and redistribute the coating more thinly.
The wrap isn’t sticky enough
The resin is responsible for much of the cling. A beeswax-only wrap will naturally have less tack.
A small amount of suitable food-grade resin can make a noticeable difference.
The wrap feels excessively sticky
You may have used too much resin or applied too thick a coating.
Reheat the wrap between parchment sheets and use the warm iron to redistribute the mixture more evenly.
There are dry patches
The wax hasn’t reached those areas properly.
Place the wrap back between parchment sheets and gently heat it until the coating melts and spreads into the uncovered sections.
The wax is flaking
This usually points to an overly thick or uneven coating.
Warm the wrap gently between parchment sheets and allow the wax to redistribute through the cotton.
How Long Do Beeswax Wraps Last?
With regular use and gentle cleaning, homemade wraps can last many months. Their lifespan depends on how frequently they’re used, how aggressively they’re washed and how well they’re stored.
When the wrap becomes noticeably brittle, heavily stained, or stops holding its shape even after refreshing, it’s probably time to replace it.
The good news is that one small batch can give you several reusable wraps, so you don’t need to make them constantly.
Can You Refresh an Old Beeswax Wrap?
Yes.
If your wrap starts losing its grip or develops noticeable creases, place it between sheets of baking parchment and gently warm it with an iron.
The heat allows the wax to redistribute across the cotton. Let the wrap cool completely before using it again.
This little trick can give an older wrap a new lease on life.
A Few Smart Tips Before You Start
Keep these little details in mind for a smoother first attempt:
- Pre-wash your fabric before waxing it.
- Use 100% cotton.
- Start with a small batch.
- Melt the ingredients slowly.
- Don’t apply an excessively thick layer of wax.
- Make sure the entire fabric is coated.
- Keep food cool before wrapping it.
- Wash wraps gently with cool water.
- Never microwave them.
- Keep them away from high heat.
- Don’t use them as your main storage method for raw meat or seafood.
The Bottom Line
Making beeswax wraps at home is one of those DIY projects that’s both practical and satisfying. With a piece of cotton, some beeswax and a little patience, you can create reusable kitchen wraps instead of reaching for disposable plastic every time you need to cover something.
For the easiest version, beeswax alone will do the job. If you want a softer, more flexible wrap with better cling, adding jojoba oil and food-grade resin can improve the result.
Once you’ve made your first few, you may find yourself making different sizes for sandwiches, bowls, snacks and produce. It’s a simple little kitchen upgrade that can make everyday food storage feel a lot more reusable.